PRE Deployment v1.9.0
Creation of a secret in an app registration
Create the secret
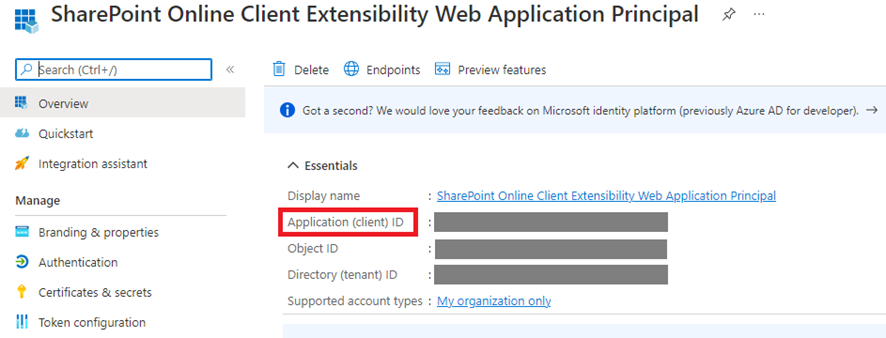
For the update of this version, we need to create a secret in the app registration SharePoint Online Client Extensibility Web Application Principal.
- Sign in to the Azure portal.
- On the Azure portal menu, search for and select Microsoft Entra ID.
- Select App registrations and select SharePoint Online Client Extensibility Web Application Principal application from the list.
- Select Certificates & secrets.
- Select Client secrets, and then select New client secret.
- Provide a description of the secret, and a duration (we recommend 2 years).
- Select Add. After saving the client secret, you will see its value displayed. Please make sure to copy this value as it cannot be retrieved later. The next step is to store it in the Key Vault.
Store the secret in the Key Vault
To use the secret that you just created in the previous step, you need to update the corresponding value in the Key Vault.
- Sign in to the Azure portal.
- On the Azure portal menu, search for and select Key vaults.
- Select the Syntphony key vault. It is the one with the tenant’s name.
- On the left menu, under Objects, select Secrets.
- Select TogoFrontendApp, and then select New Version.
- Provide the secret of previous step in Secret value.
- Select Create.
Add permission to an app registration
For Search to work properly, we need to add the Bookmark.Read.All permission to the SyntphonyBackendAPI app registration.
- Sign in to the Azure portal.
- On the Azure portal menu, search for and select Microsoft Entra ID.
- Select App registrations and select SyntphonyBackendAPI application from the list.
- Select API permissions.
- Select Add a permission.
- Select Microsoft Graph, then Delegated permissions and select Bookmark.Read.All.
- Select Add permissions.
Add new secret in the Key Vault
For the deployment to work correctly, the ID of an application record must be added to the Key Vault.
Get the app registration ID
First, let’s retrieve the application registry ID.
- Sign in to the Azure portal.
- On the Azure portal menu, search for and select Microsoft Entra ID.
- Select App registrations and select SPN_Syntphony_Azure application from the list.
- Copy the Application (client) ID.
Store the secret in the Key Vault
To use the app registration ID that you just got in the previous step, you need to create a secret value in the Key Vault.
- Sign in to the Azure portal.
- On the Azure portal menu, search for and select Key vaults.
- Select the Syntphony key vault. It is the one with the tenant’s name.
- On the left menu, under Objects, select Secrets.
- Select Generate/Import.
- Provide TogoIACAppId in the Name field and the Application ID from the previous step in the Secret value field.
- Select Create.
Register resource provider
To deploy all the resources in the release, the Microsoft.Network resource provider must be registered in the subscription where Syntphony is installed.
- Sign in to the Azure portal.
- On the Azure portal menu, search for and select Subscriptions.
- Select the subscription where Syntphony is installed.
- On the left menu, under Settings, select Resource providers.
- Find the resource provider Microsoft.Network and select Register.
Add an access policy to the Key Vault
We need to give Key Vault access permissions to the application with the App ID ‘abfa0a7c-a6b6-4736-8310-5855508787cd’ (Microsoft Azure App Service) before deployment.
- Sign in to the Azure portal.
- On the Azure portal menu, search for and select Key vaults.
- Select the Syntphony key vault. It is the one with the tenant’s name.
- On the left menu, select Access policies.
- Create a new one.
- Select the following Permissions:
- In the Principal step, search for abfa0a7c-a6b6-4736-8310-5855508787cd (Microsoft Azure App Service).
- Select Create.
Update the permissions of an app registration
Get the app registration ID
Get the app registration ID from Key vault.
- Sign in to the Azure portal.
- On the Azure portal menu, search for and select Key vaults.
- Select the Syntphony key vault. It is the one with the tenant’s name.
- On the left menu, under Objects, select Secrets.
- Select TogoLegacyBackendAppId.
- Select the Current version.
- Copy the Secret value.
Grant permission
This granting can only be done via the appinv.aspx page on the tenant administration site. You can reach this site via https://contoso-admin.sharepoint.com/_layouts/15/appinv.aspx.
Once the page has loaded, add the Client ID you obtained in the previous step and Lookup the created Principal.
To grant permissions, you will need to provide the following permissions:
<AppPermissionRequests AllowAppOnlyPolicy="true">
    <AppPermissionRequest Scope="http://sharepoint/content/tenant" Right="FullControl" />
    <AppPermissionRequest Scope="http://sharepoint/social/tenant" Right="FullControl" />
</AppPermissionRequests>
When you click on Create, you will be presented with a permission consent dialog. Press Trust It to grant the permissions.
Scaling the cache
Before running the installation, we need to manually scale the Azure Cache for Redis.
- Sign in to the Azure portal.
- On the Azure portal menu, search for and select Azure Cache for Redis.
- Select the Syntphony cache. It is the one with the tenant’s name.
- On the left menu, select Scale.
- Select Standard C0. It is the green colour option.
- Press Select to save the new configuration.
Get the installation configuration
To execute the installation of the version, the Syntphony team requires the environment configuration stored in the Storage account.
- Sign in to the Azure portal.
- On the Azure portal menu, search for and select Storage accounts.
- Select the Syntphony storage account. It is the one with the tenant’s name.
- On the left menu, select Storage browser.
- Select Tables.
- Select Releases table.
- Search for the latest version. It is the one with the RowKey 1.8.4 or 1.8.5.
- Provide the Configuration value to the Syntphony team.