How to configure the Quick Actions?
ℹ️
Audience: This article is intended for Syntphony admins
One of the functions that Syntphony allows is to configure and edit the options that appear in the Quick Actions menu. To do this you must go to: Syntphony settings > This tenant > Quick Actions
When you do this, a box appears that allows you to configure the JSON code to customize the items displayed in the Quick Actions menu.
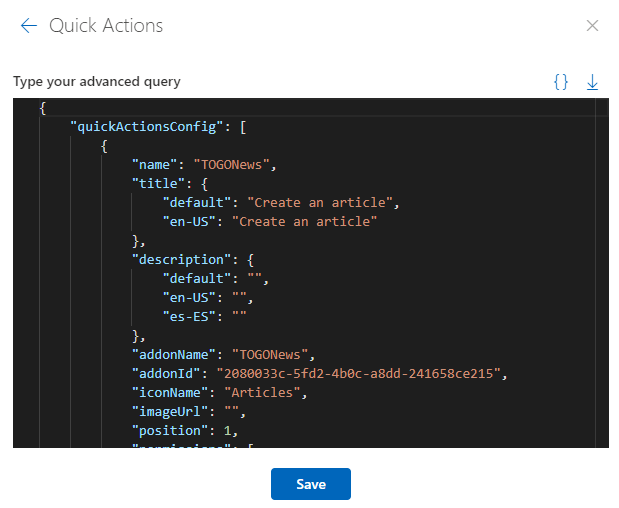
The most important elements that make up this code are:
name: quick action internal nametitle: allows you to specify, in the configured languages, the title to be displayed in the Quick Actions menu.addonName: name of the addon from which the form is to be openedaddonId: id of the addon from which the form is to be openediconName: allows you to specify the name of a specific Office UI Fabric icon to be displayed in the menu.imageUrl: in case you don’t want any icon, you can use an image indicating its url.position: allows you to indicate, in numerical form, the position of this menu entry.permissions: allows you to indicate to which users this option is shown in the menu, users can be indicated by name, by email address, or in groups.formId: if you leave this field empty, by default it opens the creation form of the indicated addon, but it allows you to indicate the specific form you want to open when you click on that menu entry.
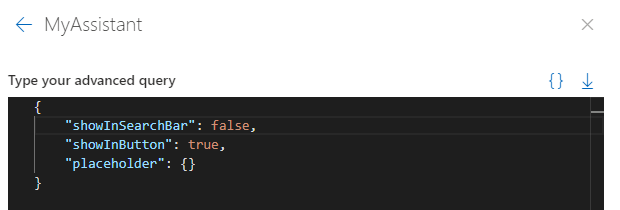
In case you don’t want the Quick Actions menu to appear, Syntphony offers an alternative called MyAssistant. This option can be activated from: Syntphony settings > This tenant > My Assistant.
And it enables a button, from which you can quickly access content creation.